Install NCL for post-processing
Install Conda
If you don’t already have “conda” installed on your system, then go to:
and select the appropriate “Python 2.7 64-bit bash installer” for your MacOSX or Linux system. Do not download the Python 3.x version! (We do not have a Windows version.)
Follow the instructions for installing miniconda. When the installation is finished, you can test it quickly by typing the following from a UNIX terminal window:
conda -V
This should echo something like “conda 4.3.13”.
Note: you can also use these conda instructions with an Anaconda distribution.
Install NCL using conda
We recommend that you install NCL under a conda “environment”, which we’ll call ncl_stable. You can call it whatever you want.
From a UNIX terminal window in sh/bash mode, type:
conda create -n ncl_stable -c conda-forge ncl=6.4.0
source activate ncl_stable
You will need to run the “source activate ncl_stable” command every time you log out and log back in.
Test the NCL installation
From a UNIX terminal window, type:
ncl -V
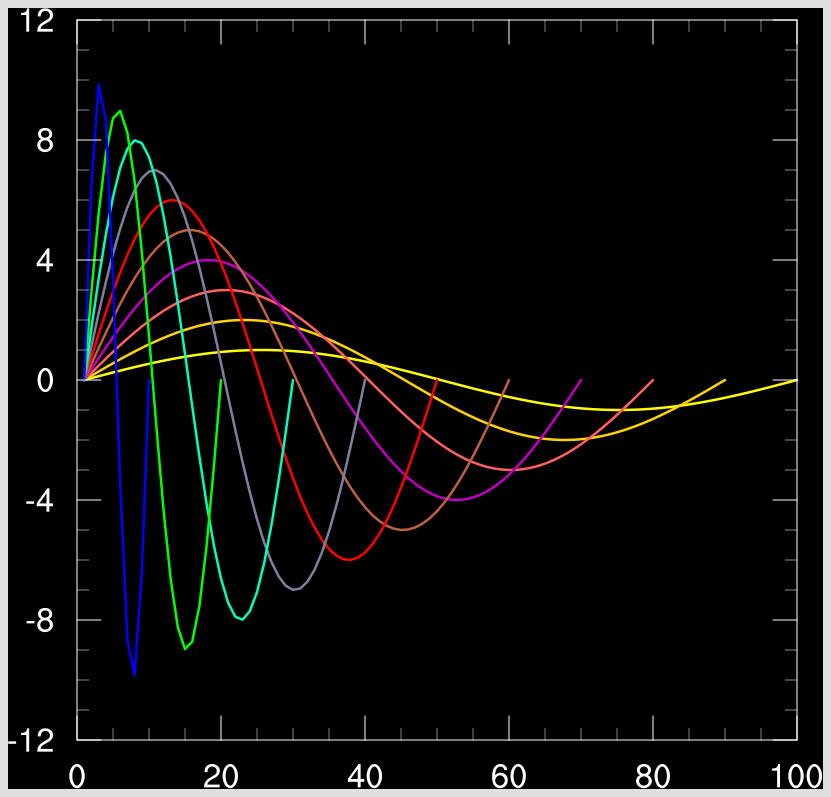
ng4ex xy05n -clean -W png
The first command should echo “6.4.0”. The second command should produce the following “xy05n.png” PNG image:
The tutorial to install NCL using conda is also available at: